
There’s a certain magic in shooting your first roll of film — that click of the shutter, the quiet anticipation, and the unknown world waiting to emerge from silver halide and chemistry. If you’ve ever typed film developing near me into your browser and wondered what happens next, you’re not alone. Learning to shoot, store, and send your roll off for development is a process both technical and beautifully personal.
It doesn’t matter what device was the first tool in your journey of reproducing the world through shooting — the cheapest camera or a more advanced SLR. What truly matters is patience, the willingness to keep going regardless of the outcome of the initial stage, and the understanding that mistakes are an inevitable yet surmountable part of the path. This guide walks you through it all — without overwhelming you right out of the gate.
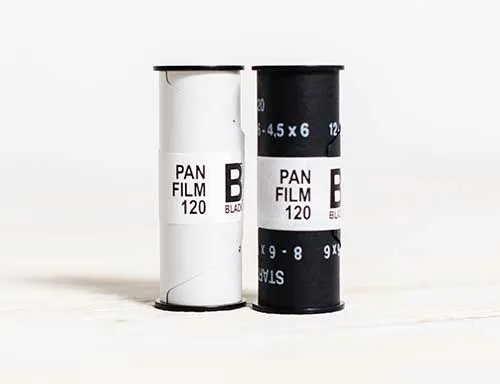
How to choose the right film before you shoot
The experience begins before your camera even sees the light. Choosing a film stock sets the tone for your entire roll. Here’s how to get it right from the start:
- Kick off with a forgiving film. Kodak Gold 200 and Fujicolor C200 are perfect entry-level options. They handle exposure mistakes well and offer vibrant, balanced results. For black and white lovers, Ilford HP5 is famously versatile.
- Pay attention to the ISO. ISO (or film speed) indicates how sensitive your film is to light. ISO 100 is perfect for sunny days and landscapes; ISO 400 or 800 works better for overcast skies, shade, or indoor shooting. The incorrect choice reveals itself during the photo developing process.
- Color or black and white? Color film captures the world as it is — warm tones, daylight hues, subtle shifts. Black and white strips that away, revealing form, shadow, and emotion. Both are rewarding in different ways.
Basic tips for shooting your first roll
You’ve loaded your film. What next? Follow these essential tips to ensure your images are returned from the lab intact and ready to print.
Pay attention to lighting
Film loves light. It thrives on natural daylight — especially in the early morning or late afternoon. Harsh midday sun can work too, but be mindful of deep shadows and high contrast. Dim indoor spaces? Tougher, but not impossible. Use higher ISO film if you’re not working with flash.
Understand film ISO
Film speed isn’t just a number — it’s how your film behaves in light. Lower ISO films (like 100 or 200) need bright conditions and produce finer grain. Higher ISO (like 800 or 1600) handles low light but has more visible grain. Choose the one that matches your lighting, and avoid switching halfway — unlike digital, you’re committed once the roll’s in.
Learn to meter
If you have a manual camera, take the time to understand your light meter. Overexposed film can often be saved, but underexposure is trickier. When in doubt, err on the side of a bit more light. Don’t rely solely on auto settings — learning to read light will serve you for years to come. In addition, it will make a difference in the subsequent camera film developing.
Don’t open the back
This sounds obvious, but it’s a rite of passage for many beginners. Opening the camera back mid-roll exposes the film to light and ruins your images. If you’re unsure, avoid touching that latch until you’ve fully rewound it.
Rewind before you open
Most film cameras require manual rewinding once the roll is done. You’ll usually feel a sense of release when it’s complete. Only then should you open the back. That small crank saves your entire shoot.
Why storing film matters before developing
When your roll is finished, how you treat it before development can affect the outcome. Film is sensitive — not just to light, but also to heat, moisture, and time. Below are some key recommendations on how to make sure that all of these factors do not become a source of destruction:
- Keep it cool. If you’re not sending it off right away, store the roll in a cool, dry place — ideally a fridge in a sealed bag. This slows down degradation and preserves color accuracy. During the film development stage, such flaws always show up.
- Avoid humidity. Damp conditions can damage emulsion and introduce mold, especially in older or expired rolls.
- Don’t wait forever. Try to send off your film within a few weeks of shooting. Color film, especially, tends to shift if left undeveloped too long.
How to send your film to a lab
Once your roll is shot and stored safely, it’s time for the final step — turning those unseen frames into real, tangible photos. Sending film to a lab is a simple process, but a few thoughtful steps can make all the difference in getting the results you’re hoping for.
How to choose a good lab
Not all film labs deliver the same quality. Look for one with solid experience, up-to-date scanning gear, and clear, honest pricing. Check reviews, explore sample scans, and make sure they handle the type of film you’ve shot. If you want reliable results and sharp-looking scans, choose a lab that specializes in professional film developing.
Why packing matters
Film is fragile. To keep your shots safe in transit, pack your roll in a padded envelope or small box, and wrap the canister in bubble wrap or foam for extra protection. Avoid shipping during extreme heat, which can damage the emulsion. A little care at this stage goes a long way — even small mistakes can ruin your work.
How to fill out the order form correctly
Most labs will include an order form for you to print and fill out. Taking a few extra minutes here can help ensure your film is processed exactly the way you want. Before sending, double-check that:
- Your contact info is clear and legible
- You’ve selected the correct film type (color, black & white, or slide)
- Scan size and file format (JPEG, TIFF, etc.) are specified
- Any special instructions are easy to read and understand
Your timeline expectation
Most labs take 3–7 business days once your roll arrives. Some offer express options. Remember: quality film development takes time. Check if the lab offers expedited camera film developing services or if there’s a priority processing option available. But this should only be taken care of if you are faced with an acute lack of time.
Final tips for your first analog film journey
Shooting film is both technical and deeply creative — a blend of trial, instinct, and artistic exploration. Here are a few tips to help you enjoy the process even more:
- Don’t stress over mistakes
Missed exposures, accidental rewinds, light leaks — they’re all part of the charm. Every imperfect frame is a step toward better ones.
- Keep a notebook
Track what film you used, the settings you tried, and how each photo felt. This practice will improve your skills faster than any other method.
- Start planning your second roll
The best part of finishing your first roll? Starting the next. Maybe you’ll try a new film stock or explore nighttime photography. One roll leads to another — and that’s where the real magic begins.
As you gain more experience with developing film, the process will become second nature. But it won’t lose its sense of wonder — especially as you learn from each roll and see your skills evolve over time. So go ahead — load up that next roll and keep the journey going.